
Mastering CSS layouts is among the most difficult components of net design. Specifically, in case you simply go to the documentations and begin studying dry supplies with very primary examples, it is even more durable to get a sensible understanding of the ideas.
On this collection of posts, you will be taught CSS layouts by way of sensible examples you should use in your initiatives.
The best option to straight see the results of our work is to construct our web site with DoTenX UI-builder.
If you do not have an account there, you’ll be able to create one totally free and comply with alongside this tutorial. It is value mentioning you’ll be able to construct limitless quantity web sites on DoTenX totally free and everytime you attain the preliminary restrict of your initiatives, you’ll be able to ask for a rise.
Be aware: Once you create a venture on DoTenX, swap to superior mode as a result of we wish to have full management over the html parts and types.

Let’s design the next format as our first instance.

CSS properties we be taught:
- show
- flex-direction (column)
- justify-content
The part is borrowed from an awesome design by Syed Raju here.
Step 1:
We begin by including a Field which renders a div component to our web page.

Now we go on to the CSS properties part within the Kinds tab the place we straight add the CSS properties.

Add the next property-value pairs:
show: flexflexDirection: columnalignItems: middlewidth: 300pxbackgroundColor: hsla(0, 0%, 98%, 1)
The very first step in including/making use of flexbox format is to set show property to flex, which creates a flex container for us (an space of a doc laid out utilizing flexbox).
We would like the weather in our flex container to be positioned in a column that is why we set the flex-direction to column.
You would possibly discover we used camelCase as a substitute of kebab-case to consult with the CSS property and that is as a result of DoTenX UI-builder follows ReactJS naming conventions. Once you render the web page, the ensuing CSS properties might be rendered in kebab-case.
We wish to horizontally align kids parts (flex gadgets) in centre, that is why we set align-items to middle.
Lastly, we set the width and background-color values.
Step 2:
Add a picture to the div by dragging an Picture component from the Components tab and dropping it contained in the Field.

I’ve used this picture from Freepik, however you should use the url of the picture you want or add a picture.
Step 3:
Add a Tex component after the Picture component which is able to finally render a p tag.
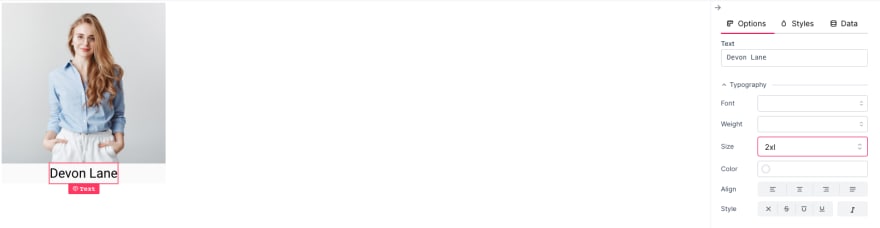
Set the textual content and dimension to the specified values (I’ve set it to 2xl on this instance). As our focus is on the flexbox I am utilizing the straightforward choices of UI-builder to set the font-size which is one other benefit of utilizing DoTenX UI-builder, permitting us to give attention to what we wish.
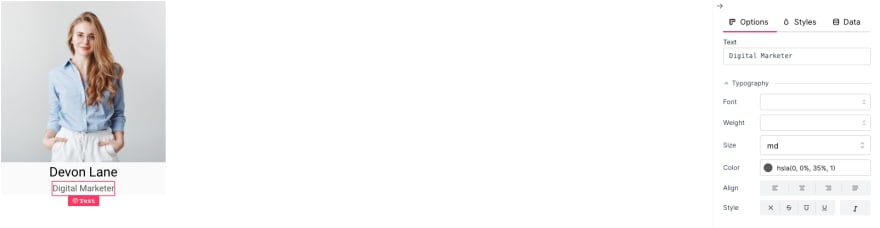
Step 4:
Precisely identical as step 3 simply with a unique textual content and a smaller dimension, and a barely light coloration.
Step 5:
As a closing contact, to implement our part extra precisely, we set the highest margin of our texts and provides a border radius of 10px to the flex container we created in step 1, and provides it backside padding.
On this revealed web page you’ll be able to see the top outcome:
https://gracious-lederberg-3196150654.web.dotenx.com/index.html
The identical beautify design can be utilized to point out extra fascinating options of flexbox format.

CSS properties we be taught:
- flex-direction (row)
- justify-content
Step 1:
Add a Field with width of 100% with the next properties:
show: flexflexDirection: rowwidth: 100%
Utilizing these properties we’ve got made the div a flex container with a horizontal format. Do not forget that the default worth of flex-direction is row anyway. We additionally set the width to ensure our div expands your entire width of the web page (Go away a remark if you understand an alternate for width: 100%).

Step 2:
Add 4 copies of the profile-card we created within the Instance 1 to the div we created in Step 1.
To keep away from repeating the steps you should use the trick I used. Simply export the component from the Structure tab and add the exported component to the Field. That is similar to the idea of re-usable parts utilized in superior situations akin to utilizing React, Vue, and many others.
Export: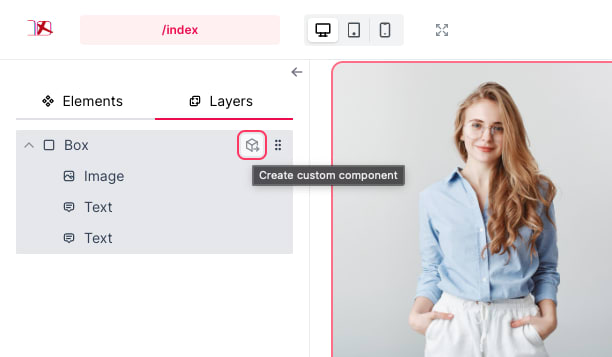
Use:
After including the playing cards to the father or mother div, you’ll be able to examine the preview and you need to have one thing like this:

Step 3:
As you’ll be able to see within the preview, all of our gadgets are positioned subsequent to every one another with none house between them.
To repair this, set justify-content property of the flex container Field to space-around and that is the outcome:

Right here yow will discover the revealed outcome (all of the picture are from Freepik):
https://gracious-lederberg-3196150654.web.dotenx.com/flex-row.html
Strive-it: Now resize your browser window to see the end in smaller screens. Do you see any downside? How do you assume we are able to clear up the difficulty? Remark down under and remember to comply with for the following components of this collection exhibiting you methods to take care of such circumstances.
On this tutorial we noticed methods to construct vertical and horizontal layouts utilizing Flexbox. We discovered about a number of the generally used phrases, akin to flex container and flex merchandise.
We additionally discovered about setting the route of the format, and adjusting the association of the flex gadgets. It’s value mentioning, as a rule of thumb, if you wish to set the order of flex gadgets in the identical route because the flex container, use justify-content, in any other case use align-items.
When you’ve got any questions, be happy to ask and see you within the subsequent tutorial.