
Creator: Temitope Oyedele
Micro Frontend is an idea from microservice. They’ve grow to be a preferred technique of accelerating flexibility. It allows groups to mix elements created with the identical framework, numerous frameworks, or libraries.
On this tutorial, we are going to dive into what Micro Frontend is. Additionally, talk about its benefits and the way it works by sharing its state inside two totally different functions utilizing Module Federation. What we’ll cowl:
- What’s Micro-frontend?
- Advantages of Micro-frontend
- A fast take a look at instruments used on this tutorial (module federation, Strapi, React)
- The way it works
- Conclusion
Let’s get began!
What Is Micro Frontend?
The time period “micro frontend” comes from the idea of microservices. Contemplate a Micro Frontend to be an internet site comprised of varied net pages. These pages include options contributed by a number of groups.
Contemplate the case of Strapi. The header part and the contents of the primary web page or different pages could have been produced by separate groups. These groups function in numerous methods to assemble the principle Strapi web site.
Micro frontends may also be thought-about separate pages on the principle web site. These pages work collectively to kind the web site. Micro frontends are a standard approach to increase flexibility. It allows groups to mix elements created in a number of frameworks or libraries.
There are quite a few approaches to implementing micro frontends. On this tutorial, we’ll concentrate on module federation, however first, let us take a look at its advantages and the way we cut up our apps.
Advantages of Micro Frontends
There are numerous advantages of utilizing micro frontends, a few of them embody:
Impartial deployments
Micro frontends, like incremental upgrades, assist to restrict the scope of deployments. All decoupled codebases ought to have their very own CI/CD pipelines in order that groups can independently decide whether or not their app is prepared for manufacturing and, in that case, that no points from different apps will hurt it. Moreover, with monoliths, you will need to package deal and deploy all the code for a little bit of modification or repair some sections of the app. Pipelines for monoliths have long-running construct and check processes, however with a micro-frontend, you’d merely ship the app the place the repair is required.
Impartial groups
As a result of we’ve separated codebases and autonomous deployments, the groups can personal the mission from begin to end. The groups can have full management over their deliverables. As an apart, in lots of tasks with monoliths, the frontend crew is structured primarily based on technical expertise. For instance, one crew will deal with all format and markup work, one other will deal with all logic work, and one other will deal with CSS particulars and animations. This setting might not be relevant in micro frontends, the place every crew should have all builders with Structure, Logic, and CSS detailing capabilities.
Simpler upkeep and bug fixes
Should you’ve ever labored with giant functions, you understand how troublesome they are often to keep up, particularly after they’re monolithic and certain to develop giant. Micro frontends, then again, make use of the divide-and-conquer approach. On account of utilizing this structure on your net utility, you may make each enterprise requirement simpler to keep up and likewise repair bugs.
Tech stack freedom
As a result of micro frontends are made up of small, impartial parts, you may construct every one with a unique technological stack, which has confirmed useful in some ways. Considered one of that are we are able to divide a crew into quite a few tiny groups primarily based on competence in a selected tech stack, which additionally adheres to the concept of single duty. Second, as a result of many tech stacks might be used on the identical mission, it will likely be simpler to rent contemporary builders.
Easy decoupled models.
A monolith has a considerable amount of code that grows over time. Quite the opposite, the supply code for micro frontends could be considerably smaller, which might be an enormous reduction. Moreover, micro frontends, like microservices, would power us to create correct boundaries between apps and keep away from all couplings which will unintentionally exist in monoliths.
How Do We Cut up Apps?
Listed below are some examples of how builders cut up giant apps:
Web page by web page
Having a number of pages open on the identical time may trigger units to crash. In these circumstances, splitting by web page is probably the most safe selection.
You’ll be able to run impartial, distinctive micro-apps for every web page if in case you have applicable routing.
By way of performance
Assume you have got a single web page with quite a few options. Then it’s possible you’ll separate these notable options into smaller apps. It would flip every one right into a separate utility that runs a selected performance.
By part
It’s also possible to manage your apps into sections. It permits many applications to share the identical chunk or elements.
Now that we perceive what micro-frontend is let’s take a short take a look at what Strapi is in addition to Module Federation.
Module Federation
Zack Jackson designed the JavaScript module federation framework. The thought is to make code sharing extra manageable and autonomous. It allows one JavaScript program to import code from one other. This may be completed by configuring Webpack.
The module will create a novel JavaScript entry file. This file is accessible to different apps. It permits you the liberty and adaptability to assemble your mission precisely the way you need.
We now have a fundamental understanding of what Micro frontend is and likewise what module federation is. Let’s now showcase the way it works by doing a fast tutorial.
What Is Strapi?
Strapi is an open-source headless CMS. It allows the creation of configurable APIs in any frontend utility. Strapi is straightforward to make use of because it permits you to create versatile APIs with distinctive options that you will recognize.
To maintain issues structured, you may construct customized content material sorts and relationships between them. It additionally has a media library to avoid wasting images and music recordsdata.
Stipulations
To comply with via with this text, you will want the next:
- React: React is a free and open-source frontend JavaScript library for creating UI components-based person interfaces.
- Yarn or npm put in.
- Node 14 put in.
- A fundamental understanding of
JavaScript.
Venture Scope
To indicate the way it works, we’ll make a small app consisting of two separate functions. The primary comprises the header, whereas the opposite will include the content material. We’ll be utilizing Strapi to show our pricing card.
The goal is to know how Micro Frontend works so you should use this idea to construct extra advanced and thrilling functions.
Organising Strapi
To get began, we’ll first have to put in Strapi. Create a folder known as microfrontends from the terminal. That is the place we would like our Strapi set up. Additionally the pattern mission we’ll be utilizing will even be saved there:
mkdir microfrontends
Subsequent, cd into the simply created folder and run both of the next instructions:
npx create-strapi-app@newest my-project --quickstart
    #or
 yarn create strapi-app my-project --quickstart
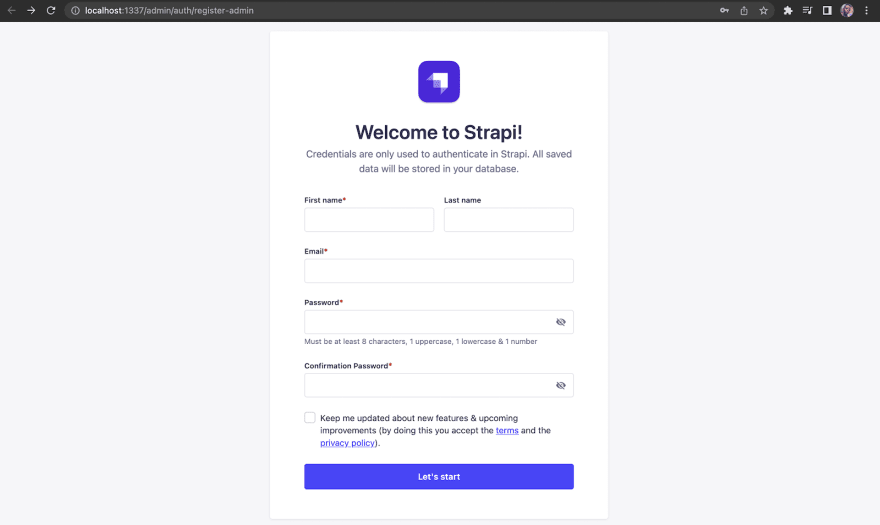
It will set up all the packages required for this mission. Our Strapi utility might be began immediately in our browser after set up.
After registering to configure our backend contents and APIs, it will direct us to the admin homepage.
Creating Our Assortment Kind
To create a set kind, in your admin homepage, go to content-type builder and create a brand new assortment kind. I will be naming my assortment kind the show title of show (Bizarre, proper?). You will discover that Strapi robotically pluralizes it for us.
For our Show, we’ll must create a title within the type of textual content, an outline within the type of a wealthy textual content label, and a worth within the type of textual content. Let’s go and create them:

Click on on save to avoid wasting our assortment, and let’s transfer on to populate our assortment.
Populate the gathering
Now, within the high left nook of the admin web page, choose content material supervisor. It would direct you to the web page the place we are going to add content material to our database. You’ll be able to populate the content material with as a lot content material as you need.

After we’re via, we are able to both save and check it first or bypass that step and publish it instantly.
To make our Show out there to devour in our react Frontend, navigate to Roles underneath Customers and Permissions Plugins. Then click on on the public and scroll right down to permissions.
At any time when we attempt to retrieve it by utilizing the Strapi API, it sends us the info.
We’re carried out with the primary half! Let’s transfer on to create our frontend functions.
Organising our frontend Purposes
In our folder listing, run the next command:
npx create-mf-app
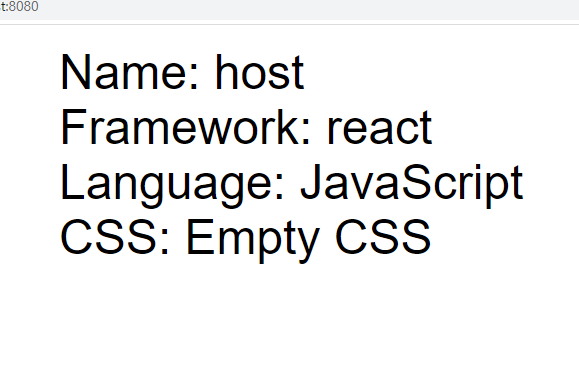
We’ll name this the host app, which is able to devour a Micro Frontend from a distant app. Let’s give it the title of host after which the port quantity 8080.

Then we’ll select to React as our framework and choose JavaScript and CSS

Subsequent, cd into the simply created folder and run:
npm set up
You additionally ought to set up axios:
npm set up axios
Subsequent, begin it up by working:
npm begin
We must always see one thing like this:
Now let’s create one other utility for our distant App. Open a brand new terminal and run the identical set up:
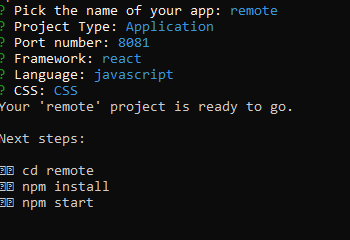
npx create-mf-app
This might be our distant app, so give it the title of distant, the mission kind would even be utility and provides it a port of 8081. We’ll even be giving it the identical configuration as we did for our host utility.
cd into the simply created folder and run:
npm set up
You can begin it up by working:
npm begin
It’s best to have one thing like this pop up in your browser:

We now have each of our functions arrange!
Now think about Strapi or any group had two groups tasked with creating the primary web page of a web site. The primary crew took care of the header part, whereas the opposite crew took care of the contents on the primary web page.
The distant app we created might be for the header whereas the host comprises our content material. That’s what we’re going to obtain on this mission. We’ll mix the work carried out by each groups utilizing module federation.
Navigate to the distant app. Inside our src folder, create a brand new file known as Header.jsx and enter this into it:
    import React from "react";
    import "./model.css";
    perform Header() {
      return (
        <div>
          <nav>
            <ul>
              <li>
                <a href="/">Dwelling</a>
              </li>
              <li>
                <a href="/">About</a>
              </li>
              <li>
                <a href="/">Information</a>
              </li>
              <li>
                <a href="/">Contact</a>
              </li>
            </ul>
          </nav>
        </div>
      );
    }
    export default Header;
Create one other file known as model.css so as to add a bit styling to it:
    /* Repair navigation to create a sticky nav bar */
    nav {
        place: fastened;
        margin-high: -20px;
        width: 100%;
        background-shade: #1a1a1a;
        padding: 0 25px;
    }
    nav ul {
        margin: 0;
        padding: 0;
    }
    nav li {
        show: inline-block;
        width: 70px;
        shade: #fff;
        textual content-align: middle;
        padding: 10px 0;
    }
    nav li:energetic {
        background-shade: #333333;
    }
    nav li:hover {
        background-shade: #8f8f8f;
    }
    nav a {
        textual content-ornament: none;
        shade: #fff;
    }
    nav button {
        show: none;
    }
Subsequent, go to app.jsx inside our src folder and import the Header.jsx into it. Our App.jsx ought to seem like this:
    import React from "react";
    import ReactDOM from "react-dom";
    import Header from "./Header";
    import "./index.css";
    const App = () => (
      <div className="container">
        <div><Header/></div>
      </div>
    );
    ReactDOM.render(<App />, doc.getElementById("app"));
We must always have a easy header exhibiting in our browser.

Now let’s share the state of our distant App with our host app, the place we’ll concentrate on including content material. We’ll convert our Header right into a Micro Frontend to do that. Let’s open up the webpack config file inside our host App. Scroll right down to the module federation plugin. It’s best to discover that it has a default title known as distant. We might change it to any title we would like, but it surely needs to be a sound JavaScript variable title. Contained in the exposes{}, add this:
"./Header": "./src/Header.jsx",
What we’re saying is that this utility exposes the header. Let’s restart our distant app. To do this, press the ctrl+c to cease after which npm begin.
You may not discover this, however a brand new file is generated by webpack. You’ll be able to see it by including /remoteEntry.js within the localhost:8081 URL.

It’s a manifest of all of the modules uncovered from the distant utility.
Let’s copy the URL of our distant, which is localhost:8081/remoteEntry.js. Subsequent, go to our host listing. Contained in the src/webpack.config.js, scroll right down to plugins: ModuleFederationPlugin.
As a substitute of posting this inside our exposes, we’ll be pasting it contained in the remotes{} part:
distant: " distant@http://localhost:8081/remoteEntry.js "
Should you’re questioning why it is named distant, it’s as a result of that was what we outlined it as in our webpack.config in our distant utility.
What we do now will enable us to entry any uncovered elements from the distant utility.
Inside our App.jsx, in our host app, lets import our Header and edit it to seem like this:
    import React from "react";
    import ReactDOM from "react-dom";
    import Header from "distant/Header";
    const App = () => (
      <div className="container">
        <div><Header/></div>
      </div>
    );
    ReactDOM.render(<App />, doc.getElementById("app"));
We must always see our Header now exhibiting! We simply shared the state of our distant utility with our host utility.
The thrilling factor about that is that no matter modifications are being made within the distant part get to point out additionally. The crew engaged on the content material doesn’t should hassle with tweaking the Header.
So now, let’s construct our host app by including content material that we’ll fetch from Strapi.
In our src folder create a folder known as part, and a file known as index.js. inside it, let’s paste this:
    import axios from "axios";
    const url = "http://localhost:1337/api/shows";
    export const readDisplay = () => axios.get(url);
Right here we’re fetching our show content material from Strapi utilizing Axios
Now let’s create one other file known as view.jsx and paste this:
    import React from "react";
    import ReactDOM from "react-dom";
    import { useState, useEffect } from "react";
    import * as part from "./elements/index";
    perform View() {
      const [display, setDisplay] = useState([]);
      useEffect(() => {
        const fetchData = async () => {
          const consequence = await part.readDisplay();
          setDisplay(consequence.knowledge.knowledge);
        };
        fetchData();
      }, []);
      return (
        <div>
          <part id="intro">
            <p className="title">
              <span>MICRO FRONTEND</span>
            </p>
            <p>
              sit amet consectetur adipisicing elit. Sed, advert inventore deserunt
              omnis numquam cumque quisquam quos, molestiae quaerat assumenda earum
              quis nihil ea explicabo illo tempora labore? Distinctio, officia.{" "}
              <a href="/" goal="_blank">
                click on right here
              </a>
              .
            </p>
          </part>
          <div className="cards_wrapper">
            <div classNmae="pricing_card">
              {show.map((show) => (
                <div className="pricing">
                  <h2 class="title">{show.attributes.title}</h2>
                  <p class="plan_description">{show.attributes.description}</p>
                  <p class="worth">${show.attributes.worth}</p>
                </div>
              ))}
            </div>
          </div>
        </div>
      );
    }
    export default View;
Right here, we’re displaying our content material. Let’s add some styling to it. Inside our index.css, change all with this:
    physique {
      font-household: Arial, Helvetica, sans-serif;
    }

    a {
      shade: #e310cb;
      textual content-ornament: none;
    }
    a:hover {
      shade: #ff17e4;
      textual content-ornament: none;
    }
    /* intro kinds*/
    #intro {
      padding-backside: 10rem;
      background-shade: #171321
    }
    #intro p {
      font-dimension: 1rem;
      line-peak: 1.5;
      shade: #fff;
    }

    .title span {
      margin-high: 18px;
      font-household: var(--sans);
      font-dimension: 4rem;
      shade: #86fbfb;
      show: block;
    }
    intro h2 {
      font-dimension: 10rem;
      shade: #fff;
    }

    .pricing {
      show: flex;
      float: left;
      width: 25%;
      flex-path: column;
      margin-left: 50px;
      margin-high: 20px;
      background-shade: white;
      shade: #333;
      min-peak: 320px;
      max-width: 260px;
      border-radius: 8px;
      field-shadow: 1px 10px 20px rgba(0, 0, 0, .2);
    }
    .title {
      font-dimension: 32px;
      font-weight: 300;
      margin-backside: 16px;
    }
    .plan_description {
      margin-backside: 48px;
      shade: lightslategray;
      line-peak: 140%;
      letter-spacing: .25px;
    }
    .worth {
      font-dimension: 52px;
      font-weight: daring;
      margin-backside: 4px;
    }
    .price_description {
      font-dimension: 12px;
      shade: lightslategray;
      margin-backside: 16px;
    }
Now let’s replace our App.jsx file to incorporate our View part:
    import React from "react";
    import ReactDOM from "react-dom";
    import Header from "distant/Header";
    import View from "./View";
    import "./index.css";
    const App = () => (
      <div className="container">
        <div>
          <Header />
        </div>
        <div>
          <View />
        </div>
      </div>
    );
    ReactDOM.render(<App />, doc.getElementById("app"));
Right here’s our consequence:

We simply constructed ourselves a Micro Frontend web site utilizing module federation!
This is a hyperlink to codes on my GitHub repository.
Conclusion
On this article, we talked about micro frontend and its advantages, module a federation, a robust instrument for creating micro frontend apps.
We additionally did a tutorial, the place we practiced how Micro Frontend works by creating two separate functions, one for the Header and the opposite for the content material, which was our pricing playing cards utilizing Strapi assortment varieties. I sit up for seeing what advanced micro frontend stuffs you may construct with Strapi and sharing them with the group. Would you please share in case you discovered this beneficial?