
Prerequisite
- Javascript
- Subsequent | React
Introduction
Constructing a weblog profile utilizing xata because the backend and cloudinary to deal with pictures.
xata is a serverless backend created to attach together with your front-end software.
Organising NextJS
On this part we’ll be constructing the construction of our front-end software with subsequent js.
N:B for the time being of this text, model 12.2.0 was applied and there could be slight adjustments to model 13 which will probably be out quickly.
Npm set up.
https://docs.npmjs.com/cli/v6/commands/npm-install
Set up NextJS
https://nextjs.org/learn/basics/create-nextjs-app/setup
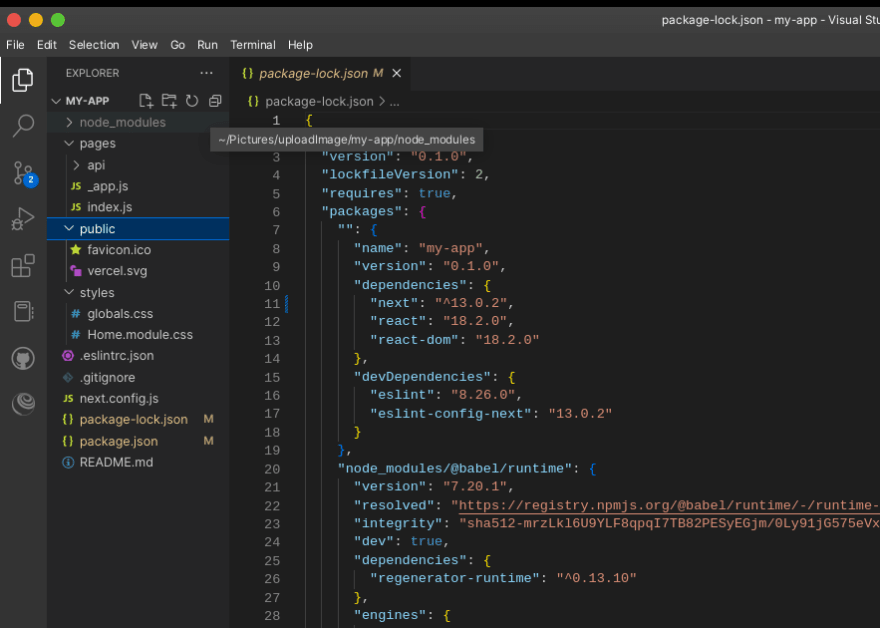
Upon the profitable set up of those instruments, we’d have a construction of
In my app folder, we have to create a element folder, the folder will maintain each element of our net app.
We’ll be creating information
- Header.js
- put up.js
- uploadwidget.js
In our Header.js file, we’re going to construct a navigation bar and button that handles our authentication upon signing into the app for us to render within the pages/index.js.
 import { useSession, signIn, signOut } from "next-auth/react";
    import Hyperlink from "subsequent/hyperlink";
    export default perform Header() {
      const handleSignin = (e) => {
        e.preventDefault();
        signIn();
      };
      const handleSignout = (e) => {
        e.preventDefault();
        signOut();
      };
      const { information: session } = useSession();
      return (
        <div className="header">
          <Hyperlink href="/">
            <a className="brand">FlauntSpace</a>
          </Hyperlink>
          {session && (
            <a href="#" onClick={handleSignout} className="btn-signin">
              SIGN OUT
            </a>
          )}
          {!session && (
            <a href="#" onClick={handleSignin} className="btn-signin">
              SIGN IN
            </a>
          )}
        </div>
      );
    }
We imported the subsequent hyperlink and the next-auth for it to deal with authentication utilizing third-party (GitHub, google) whereas we did this, the subsequent auth library offers us the performance to deal with the signing.
Now, we open up our pages/index.js and clear the default code that makes us thinker
import { useSession } from "next-auth/react";

   export default perform House() {
     const { information: session, standing } = useSession();
     const loading = standing === "loading";

     return (
        <>
          <div className={kinds.container}>
            <Head>
              <title>FlauntSpace</title>
              <hyperlink rel="icon" href="/favicon.ico" />
            </Head>
            <Header />
          </div>
      </>
      )
    }
We’ve to fashion our code to beautify it for a greater interface and expertise. The subsequent bundle offers the default kinds/international.css
html,
physique {
 padding: 0;
 margin: 0;
 background-color: #2d3436;
 font-family: -apple-system, BlinkMacSystemFont, Segoe UI, Roboto, Oxygen, Ubuntu, Cantarell, Fira Sans, Droid Sans, Helvetica Neue, sans-serif;
 }
 a {
  coloration: inherit;
  ext-decoration: none;
 }
    * {
      box-sizing: border-box;
    }
    .header {
      show: flex;
      align-items: heart;
      justify-content: space-between;
      background-color: rgb(110, 90, 90);
      coloration: #fff;
      padding: 0 2rem;
      width: 100%;
        box-shadow: 0 10px 20px rgba(82, 71, 71, 0.19), 0 6px 6px rgba(0,0,0,0.23);
    }
    .brand {
      font-weight: 800;
      coloration: #fff;
      font-size: 1.8rem;
      font-style: indirect;
    }
    .btn-signin {
       box-sizing: border-box;
      -webkit-appearance: none;
         -moz-appearance: none;
              look: none;
      background-color: #000;;
      define: none;
      border: 0;
      cursor: pointer;
      show: -webkit-box;
      show: flex;
      align-self: heart;
      font-size: 1.2rem;
      line-height: 1;
      margin: 20px;
      font-weight: 700;
      padding: 1.2rem;
        width: 14rem;
        text-align: heart;
        show: flex;
        align-items: heart;
        justify-content: heart;
      text-align: heart;
      font-family: inherit;
      user-select: none;
      coloration: #000;
      background-color: #353430;
    }
    .btn-signin:hover {
      background-color: #353430;
      coloration: #000;
    }
We’d use this CSS code snippet.
Transferring ahead that we create our authentication to enter our app profile, and we’re utilizing GitHub and google authentication to bypass this part.
To create a GitHub shopper Id and secret key
https://www.knowband.com/blog/user-manual/get-github-client-id-client-secret-api-details/
We’d do the identical to google authentication.
https://developers.google.com/adwords/api/docs/guides/authentication
Now we will probably be creating our .env file in our app, that is for us to not reveal our safety keys to customers
Our .env file ought to seem like this after following the process on
https://next-auth.js.org/providers/github
GOOGLE_ID=<your googleID generated>
GOOGLE_SECRET=<secret key generated by google>
GITHUB_ID=<githubID>
GITHUB_SECRET=<AUTHENTICATION SECRETKEY BY GITHUB USING THE ACTION>
NEXTAUTH_URL=http://localhost:3000
Within the pages/api/auth/…nextauth.js file, import the generated authentication from Google and GitHub for our software to work together with API.
    import NextAuth from "next-auth";
    import GitHubProvider from "next-auth/suppliers/github";
    import GoogleProvider from "next-auth/suppliers/google";
    const choices = {
      suppliers: [
        GitHubProvider({
          clientId: process.env.GITHUB_ID,
          clientSecret: process.env.GITHUB_SECRET,
          authorization: { params: { scope: "notifications" } },
        }),
        GoogleProvider({
          clientId: process.env.GOOGLE_ID,
          clientSecret: process.env.GOOGLE_SECRET,
          authorization: {
            params: {
              scope: "notifications",
            },
          },
        }),
      ],
    };
 export default (req, res) => NextAuth(req, res, choices);
We’ve securely added our authentication and it ought to permit our app to be displayed when authentication is handed
In our app, we’re to have a show that lets customers add a profile image they usually may also put up a mini weblog.
Create a put up.js file in our elements folder that takes in a textual content space and put up button to permit customers to put up content material
    import { useState } from "react";
    import kinds from "../kinds/House.module.css";
    export perform Put up() {
      return (
        <type motion="api/type" methodology="put up">
          <label htmlFor="body-content" className={kinds.flauntText}>
            Flaunt
          </label>
          <textarea rows="4" cols="50" className={kinds.bodyText}>
            Enter textual content right here...
          </textarea>
          <br />
          <button sort="submit" className={kinds.postbut}>
            Put up
          </button>
        </type>
      );
    }
Additionally, we’d create uploadWidget.js within the elements.
 import { useState } from "react";
    import kinds from "../kinds/House.module.css";
    export perform ImageUpload() {
      const [isImageUploaded, setIsImageUploaded] = useState(false);
      async perform handleWidgetClick() {
        const widget = window.cloudinary.createUploadWidget(
          {
            cloudName: "dhpp7gaty",
            uploadPreset: "my add",
            resourceType: "picture",
          },
          (error, outcome) => {
            if (!error && outcome && outcome.occasion === "success") {
              console.log("Achieved! Right here is the picture data: ", outcome.data);
              setIsImageUploaded(true);
            } else if (error) {
              console.log(error);
            }
          }
        );
        widget.open();
      }
      return (
        <div className={kinds.container}>
          <div className={kinds.vertical}>
            <button
              className={kinds.button}
              sort="button"
              onClick={handleWidgetClick}
            >
              Add picture
            </button>
          </div>
          {isImageUploaded ? (
            <>
              <div>Efficiently uploaded</div>
            </>
          ) : null}
        </div>
      );
    }
We’ve our add button is working utilizing cloudinary add widget.
https://cloudinary.com/documentation/upload_widget and now we’ll be styling our app.
Let’s create House.module.css file within the kinds folder and we must always use this snippet.
    @import url('https://fonts.googleapis.com/css2?household=Island+Moments&show=swap');
    .container {
      min-height: 10vh;
      show: flex;
      flex-direction: column;
      justify-content: heart;
      align-items: heart;
    }
    .predominant {

    }
    .title {
      border-radius: 50%
    }
    .profile {
      grid-column: 2;
      grid-row: 2;
      background-color: #eef6f8;
    }
    .content material {
      show: grid;
      grid-column: 1/3;
      grid-row: 1;
    }
    .uploadsec {
      grid-column: 1;
      grid-row: 2;
      background-color: #ccc;
    }
    .profileimg {
      border-radius: 50%;
    }


    .avatar {
      flex: 1;
      flex-basis: 250px;
    }
    .particulars {
      flex: 2;
    }
    .button {
      background-color: #449a79; /* Inexperienced */
      border-radius: 10px;
      border: none;
      coloration: white;
      padding: 15px 32px;
      text-align: heart;
      cursor: pointer;
      text-decoration: none;
      show: inline-block;
      font-size: 16px;
    }
    .bodyText {
      width: 100%;
      peak: 150px;
      padding: 12px 20px;
      box-sizing: border-box;
      border: 2px stable #ccc;
      border-radius: 4px;
      background-color: #f8f8f8;
      resize: none;
    }
    .put up {
      align-items: heart;
      justify-content: heart;
      show: flex;
    }
    .flauntText {
      font-family: 'Island Moments', cursive;
      font-weight: daring;
      font-size: 40px;
    }
    .postbut {
      background-color: #449a79; /* Inexperienced */
      border-radius: 10px;
      border: none;
      coloration: white;
      padding: 15px 30px;
      text-align: heart;
      cursor: pointer;
      text-decoration: none;
      show: inline-block;
      font-size: 16px;
    }
    .imageCloud {
      /*border: 5px stable #555;*/
      border-radius: 50%;
      show: inline-block;
      justify-content: heart;
      align-items: heart;
      width: 100px;
      border: 3px stable black;
    }
Now we now have to render all these elements on pages/index.js file
import Head from "subsequent/head";
import Header from "../elements/Header";
import kinds from "../kinds/House.module.css";
import { useSession } from "next-auth/react";
import { ImageUpload } from "../elements/uploadWidget";
import { Put up } from "../elements/put up";
import { getXataClient, XataClient } from "../src/xata";

export default perform House() {
  const { information: session, standing } = useSession();
  const loading = standing === "loading";
  // const [url, updateUrl] = useState();
  // const [error, updateError] = useState();

  return (
    <>
      <div className={kinds.container}>
        <Head>
          <title>FlauntSpace</title>
          <hyperlink rel="icon" href="/favicon.ico" />
        </Head>
        <Header />
      </div>
      <predominant className={kinds.predominant}>
        <div className={kinds.consumer}>
          {loading && <div className={kinds.title}>Loading...</div>}{" "}
          {/*authentication course of */}
          {/**Renders the house web page after authentication handed of third-party */}
          {session && (
            <div className={kinds.content material}>
              <div className={kinds.profile}>
                <>
                  <p>
                    You're logged in as
                    {/**Get's the identify and mail from the third-celebration nextauth and show it as the consumer identify on the dwelling web page */}
                    {session.consumer.identify ?? session.consumer.e mail}
                  </p>
                  {/**SPLIT spage to 2 part the place one is for the add preset and the opposite is for posting weblog put up */}
                  <type className={kinds.put up}>
                    <Put up />
                  </type>
                </>
              </div>
              <div className={kinds.uploadsec}>
                <img
                  src="https://res.cloudinary.com/dhpp7gaty/picture/add/v1667560004/Profile-uploads/jnbkgndxzlnhapxv8eed.jpg"
                  alt="add right here"
                  className={kinds.imageCloud}
                />
                <ImageUpload />
              </div>
            </div>
          )}
        </div>
      </predominant>
    </>
  );
}
Constructing a Backend with Xata
A fast tour of how xata works on the video.
https://www.youtube.com/watch?v=-KNRS2fIWdA&
Initializing the xata our mission making it auto-generate the code into an src file both in javascript or typescript.
xata init
Now,let’s import xata into our pages/index.js
import Head from "subsequent/head";
import Header from "../elements/Header";
import kinds from "../kinds/House.module.css";
import { useSession } from "next-auth/react";
import { ImageUpload } from "../elements/uploadWidget";
import { Put up } from "../elements/put up";
import { getXataClient, XataClient } from "../src/xata";

export default perform House() {
  const { information: session, standing } = useSession();
  const loading = standing === "loading";

  return (
    <>
      <div className={kinds.container}>
        <Head>
          <title>FlauntSpace</title>
          <hyperlink rel="icon" href="/favicon.ico" />
        </Head>
        <Header />
      </div>
      <predominant className={kinds.predominant}>
        <div className={kinds.consumer}>
          {loading && <div className={kinds.title}>Loading...</div>}{" "}
          {/*authentication course of */}
          {/**Renders the house web page after authentication handed of third-party */}
          {session && (
            <div className={kinds.content material}>
              <div className={kinds.profile}>
                <>
                  <p>
                    You're logged in as
                    {/**Get's the identify and mail from the third-celebration nextauth and show it as the consumer identify on the dwelling web page */}
                    {session.consumer.identify ?? session.consumer.e mail}
                  </p>
                  {/**SPLIT spage to 2 part the place one is for the add preset and the opposite is for posting weblog put up */}
                  <type className={kinds.put up}>
                    <Put up />
                  </type>
                </>
              </div>
              <div className={kinds.uploadsec}>
                <img
                  src="https://res.cloudinary.com/dhpp7gaty/picture/add/v1667560004/Profile-uploads/jnbkgndxzlnhapxv8eed.jpg"
                  alt="add right here"
                  className={kinds.imageCloud}
                />
                <ImageUpload />
              </div>
            </div>
          )}
        </div>
      </predominant>
    </>
  );
}
{
  /**Connecting the xata to our app */
}
const xata = new XataClient();
export const getServerSideProps = async () => {
  const FlauntSpace = await xata.db.objects.getAll();
  return {
    props: {
      FlauntSpace,
    },
  };
};
We efficiently linked our database of xata to the front-end software and extra performance is querying information from our database to render it on the front-end.
N:B This text intend so as to add extra performance and could be edited as quickly because the adjustments are made.