
Serverless capabilities, lambda capabilities, capabilities as a service (FAAS), and serverless frameworks, amongst others, are some improvements leveraging serverless structure. Such an structure permits builders to construct sturdy functions with improved resilience, lowered price, and unburdened with the overhead of sustaining servers.
On this submit, we’ll learn to construct a metric tracker with premium options in a Nuxt.js utility with Appwrite’s serverless operate and Stripe.
GitHub Hyperlinks
The venture supply codes are under:
Stipulations
To totally grasp the ideas offered on this tutorial, the next are required:
- Fundamental understanding of JavaScript and Vue.js
- Docker installation
- An Appwrite occasion; take a look at this text on find out how to arrange an occasion or set up with one-click on DigitalOcean or Gitpod
- Appwrite CLI put in
- A Stripe account (sign up for a trial account, it’s fully free)
Arrange a Stripe account to course of funds
To get began, we have to log into our Stripe account to get our Secret Key. The Secret Key will come in useful for processing funds in our utility. To do that, navigate to the Builders tab and replica the Secret Key.

Combine Appwrite operate with Stripe
By default, Appwrite helps Node.js as a runtime for creating serverless capabilities. To get began, we have to log into our Appwrite console, click on the Create venture button, enter metric-tracker because the identify, after which click on Create.

Initialize operate listing
With our venture created on Appwrite, we are able to now create a listing that our operate will use to course of funds utilizing Stripe. To do that, we first must navigate to the specified listing and run the command under:
mkdir metric-stripe-function && cd metric-stripe-function
The command creates a venture folder known as metric-stripe-function and navigates into this folder.
Secondly, we have to log in to the Appwrite server utilizing the command-line interface (CLI).
appwrite login
We will probably be prompted to enter an electronic mail and password, which must be the credentials we used to enroll in the Appwrite console.
Lastly, we have to hyperlink our operate listing to the Appwrite venture created earlier by working the command under:
appwrite init venture
We will probably be prompted with some questions on find out how to arrange the venture, and we are able to reply as proven under:
How would you want to begin? <choose "Hyperlink this listing to an present Appwrite venture">
Select your Appwrite venture <choose "metric-tracker">
Create Appwrite operate contained in the venture
With our venture succesfully arrange, we are able to now proceed to making a operate by working the command under:
appwrite init operate
We may also be prompted with some questions on find out how to arrange our operate; we are able to reply as proven under:
What would you want to call your operate? <enter "metric-stripe-function">
What ID would you wish to have for your operate? (distinctive()) <press enter>
What runtime would you want to make use of? <scroll to node-18.0 and press enter>
The command will create a starter Node.js venture.

Secondly, we have to set up the required dependency by working the command under:
cd capabilities/metric-stripe-function
npm i axios
Thirdly, we have to modify the index.js file contained in the src folder as proven under:
const axios = require('axios');

module.exports = async operate (req, res) {
    const information = {
        quantity: 100,
        forex: 'usd',
        payment_method: 'pm_card_visa',
    };

    const physique = `quantity=${information.quantity}&forex=${information.forex}&payment_method=${information.payment_method}`;

    await axios
        .submit('https://api.stripe.com/v1/payment_intents', physique, {
            headers: { 'Content material-Kind': 'utility/x-www-form-urlencoded' },
            auth: {
                username: 'REPLACE WITH STRIPE SECRET KEY',
            },
        })
        .then((_) =>
            res.json({
                standing: 200,
                message: 'Subscription processed efficiently',
            })
        )
        .catch((_) =>
            res.json({
                standing: 500,
                message: 'Error processing subscription',
            })
        );
};
The snippet above does the next:
- Imports the required dependency
-
Strains 4-10 create an API physique that consists of
quantity,forex, andpayment_methodof kind card and utilizing a take a look at card (pm_card_visa) -
Strains 12-30 make an API name to Stripe by passing within the
physique, set the authentication utilizing the Secret Key, and return the suitable response
Be aware: We hardcoded the quantity, forex, and cost technique on this submit. Nevertheless, Stripe helps a number of cost strategies and choices we are able to undertake in a manufacturing atmosphere.
Lastly, we should navigate to the venture terminal and deploy our operate.
cd ../..
appwrite deploy operate
We may also be prompted concerning the operate we want to deploy. Choose the metric-stripe-function operate by urgent the spacebar key to pick out and the enter key to substantiate the choice.


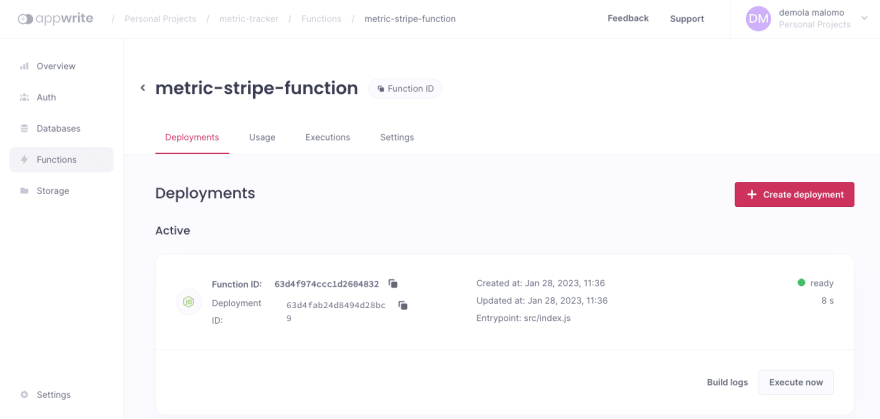
We will additionally verify the deployment by navigating to the Perform tab on the Appwrite console.
Lastly, we should replace the deployed operate permission since we have to name it from our Nuxt utility. To take action, navigate to the Settings tab, scroll to the Execute Entry part, choose Any and click on Replace.

Create a Nuxt app and arrange database
With our operate deployed and able to settle for cost through Stripe, we are able to now arrange a Nuxt venture. To get began, we have to clone the venture by navigating to the specified listing and working the command under:
git clone https://github.com/Mr-Malomz/metric-tracker.git && cd metric-tracker
Establishing the venture
First, we have to add Appwrite as a dependency by working the command under:
npm i appwrite && npm i
Then, we are able to run our venture utilizing the command under:
npm run dev


Create a database and add pattern information
First, we have to create a database with the corresponding assortment, attributes, doc, and add pattern information as proven under:
| identify | isSubscribed |
|---|---|
| John Travolta | false |

Lastly, we have to replace our assortment permission to handle them accordingly. To do that, navigate to the Settings tab, scroll all the way down to the Replace Permissions part, choose Any, mark accordingly, and Replace.

Constructing the metric tracker with subscription system
To get began, we first must create a elements/utils.js to summary the appliance logic from the UI and add the snippet under:
import { Consumer, Databases, Account, Features } from 'appwrite';

const PROJECT_ID = 'REPLACE WITH PROJECT ID';
const DATABASE_ID = 'REPLACE WITH DATABASE ID';
const COLLECTION_ID = 'REPLACE WITH COLLECTION ID';
const FUNCTION_ID = 'REPLACE WITH FUNCTION ID';
const DOCUMENT_ID = 'REPLACE WITH DOCUMENT ID';

const consumer = new Consumer();

const databases = new Databases(consumer);

consumer.setEndpoint('http://localhost/v1').setProject(PROJECT_ID);

export const account = new Account(consumer);

export const getUserDetails = () =>
    databases.getDocument(DATABASE_ID, COLLECTION_ID, DOCUMENT_ID);

export const createSubscription = () => {
    const capabilities = new Features(consumer);
    return capabilities.createExecution(FUNCTION_ID);
};

export const updateUserSubscription = (identify, isSubscribed) => {
    const information = {
        identify,
        isSubscribed,
    };
    return databases.updateDocument(
        DATABASE_ID,
        COLLECTION_ID,
        DOCUMENT_ID,
        information
    );
};
The snippet above does the next:
- Imports the required dependency
- Initializes Appwrite
consumeranddatabaseswith required arguments - Creates
account,getUserDetails,createSubscription, andupdateUserSubscriptioncapabilities for managing person classes, acquiring person particulars, creating the subscription, and updating person subscription standing
PS: We will get the required IDs on our Appwrite Console.
Secondly, we have to replace the app.vue file to make use of the account helper operate to test if a person has a sound session.
<template>
  <div class="min-h-screen bg-brand-bg lg:flex lg:justify-between">
    <Sidebar />
    <part class="w-full h-auto px-4 py-2 lg:px-8">
      <NuxtPage></NuxtPage>
    </part>
  </div>
</template>

<script setup>
import { account } from "./elements/utils";

//test session
onMounted(async () => {
  account
    .get()
    .then()
    .catch((_) => account.createAnonymousSession());
});
</script>
Thirdly, we have to replace the metrics.vue file within the pages folder as proven under:
metrics.vue Logic
<script setup>
import { getUserDetails } from "../elements/utils";

//state
const person = ref(null);

//get person particulars
onMounted(async () => {
  getUserDetails()
    .then((res) => {
      person.worth = res;
    })
    .catch((_) => {
      alert("Error loading person particulars");
    });
});
</script>
The snippet above does the next:
- Imports the required dependency
- Creates utility state and retrieves person particulars upon web page load utilizing the
getUserDetailshelper operate
metrics.vue UI
<template>
  <div class="mt-20">
    <part class="flex items-center mb-10">
      <h1 class="text-3xl font-bold inline-block mr-4">Metrics</h1>
      <p
        class="
          px-2
          text-sm
          bg-indigo-900 bg-opacity-30
          text-indigo-900
          rounded-full
        "
      >
        premium
      </p>
    </part>
    <part class="flex" v-if="person?.isSubscribed">
      <div
        class="
          border
          w-full
          flex
          justify-center
          flex-col
          items-center
          h-96
          mr-2
          rounded-md
        "
      >
        <p class="text-gray-500 mb-4">Each day perception</p>
        <h1 class="text-4xl font-bold">456367</h1>
      </div>
      <div
        class="
          border
          w-full
          flex
          justify-center
          flex-col
          items-center
          h-96
          mr-2
          rounded-md
        "
      >
        <p class="text-gray-500 mb-4">Complete perception</p>
        <h1 class="text-4xl font-bold">10956367</h1>
      </div>
    </part>
    <Locked v-else :identify="person?.identify" />
  </div>
</template>
The snippet above does the next:
- Conditionally exhibits premium metrics utilizing the person’s subscription standing
- Updates the
Lockedelement to obtainidentifyprops
Lastly, we have to replace the Locked.vue file within the elements folder as proven under:
<template>
  <div class="flex w-full flex-col items-center justify-center h-96">
    <p class="text-center justify-center mb-4">
      Oops! Appears like you do not have entry to this web page
    </p>
    <p class="text-center justify-center mb-4">
      Get full entry for by subscribing
    </p>
    <button
      class="px-8 py-2 bg-indigo-800 text-white rounded hover:bg-indigo-700"
      @click on="onSubmit"
    >
      Improve to paid
    </button>
  </div>
</template>

<script setup>
import {
  createSubscription,
  updateUserSubscription,
} from "../elements/utils";
const props = defineProps(["name"]);

const onSubmit = () => {
  createSubscription()
    .then((_) => {
      updateUserSubscription(props.identify, true)
        .then((_) => {
          alert("Subscription created efficiently!");
          window.location.reload();
        })
        .catch((_) => {
          alert("Error subscribing person!");
        });
    })
    .catch((_) => {
      alert("Error subscribing person!");
    });
};
</script>
The snippet above does the next:
- Imports the required dependency
- Defines the anticipated element props
- Creates an
onSubmitoperate that makes use of thecreateSubscriptionandupdateUserSubscriptionhelper capabilities to handle subscription - Updates the UI to make use of the
onSubmitoperate
With that accomplished, we are able to restart a growth server utilizing the command under:
npm run dev

https://media.giphy.com/media/dGd4daA38V4GWjeRg2/giphy.gif
We will validate the subscription by checking the Appwrite operate Executions tab and Stripe Log tab.


This submit mentioned find out how to construct a metric tracker with protected premium options utilizing Appwrite and Stripe. The demo is a base implementation demonstrating Appwrite’s assist for constructing serverless structure. Appwrite offers builders the magic wand to construct medium- to large-scale functions at a lowered price and glorious developer expertise.
These sources may be useful: